Nano Banana Pro for Architecture and Interior Design: A Practical Workflow
Use an existing room or model view to explore finishes, furniture, and lighting. Give each reference a clear role, compare every candidate with its source, and save the chosen concept alongside the measured design.
On this page
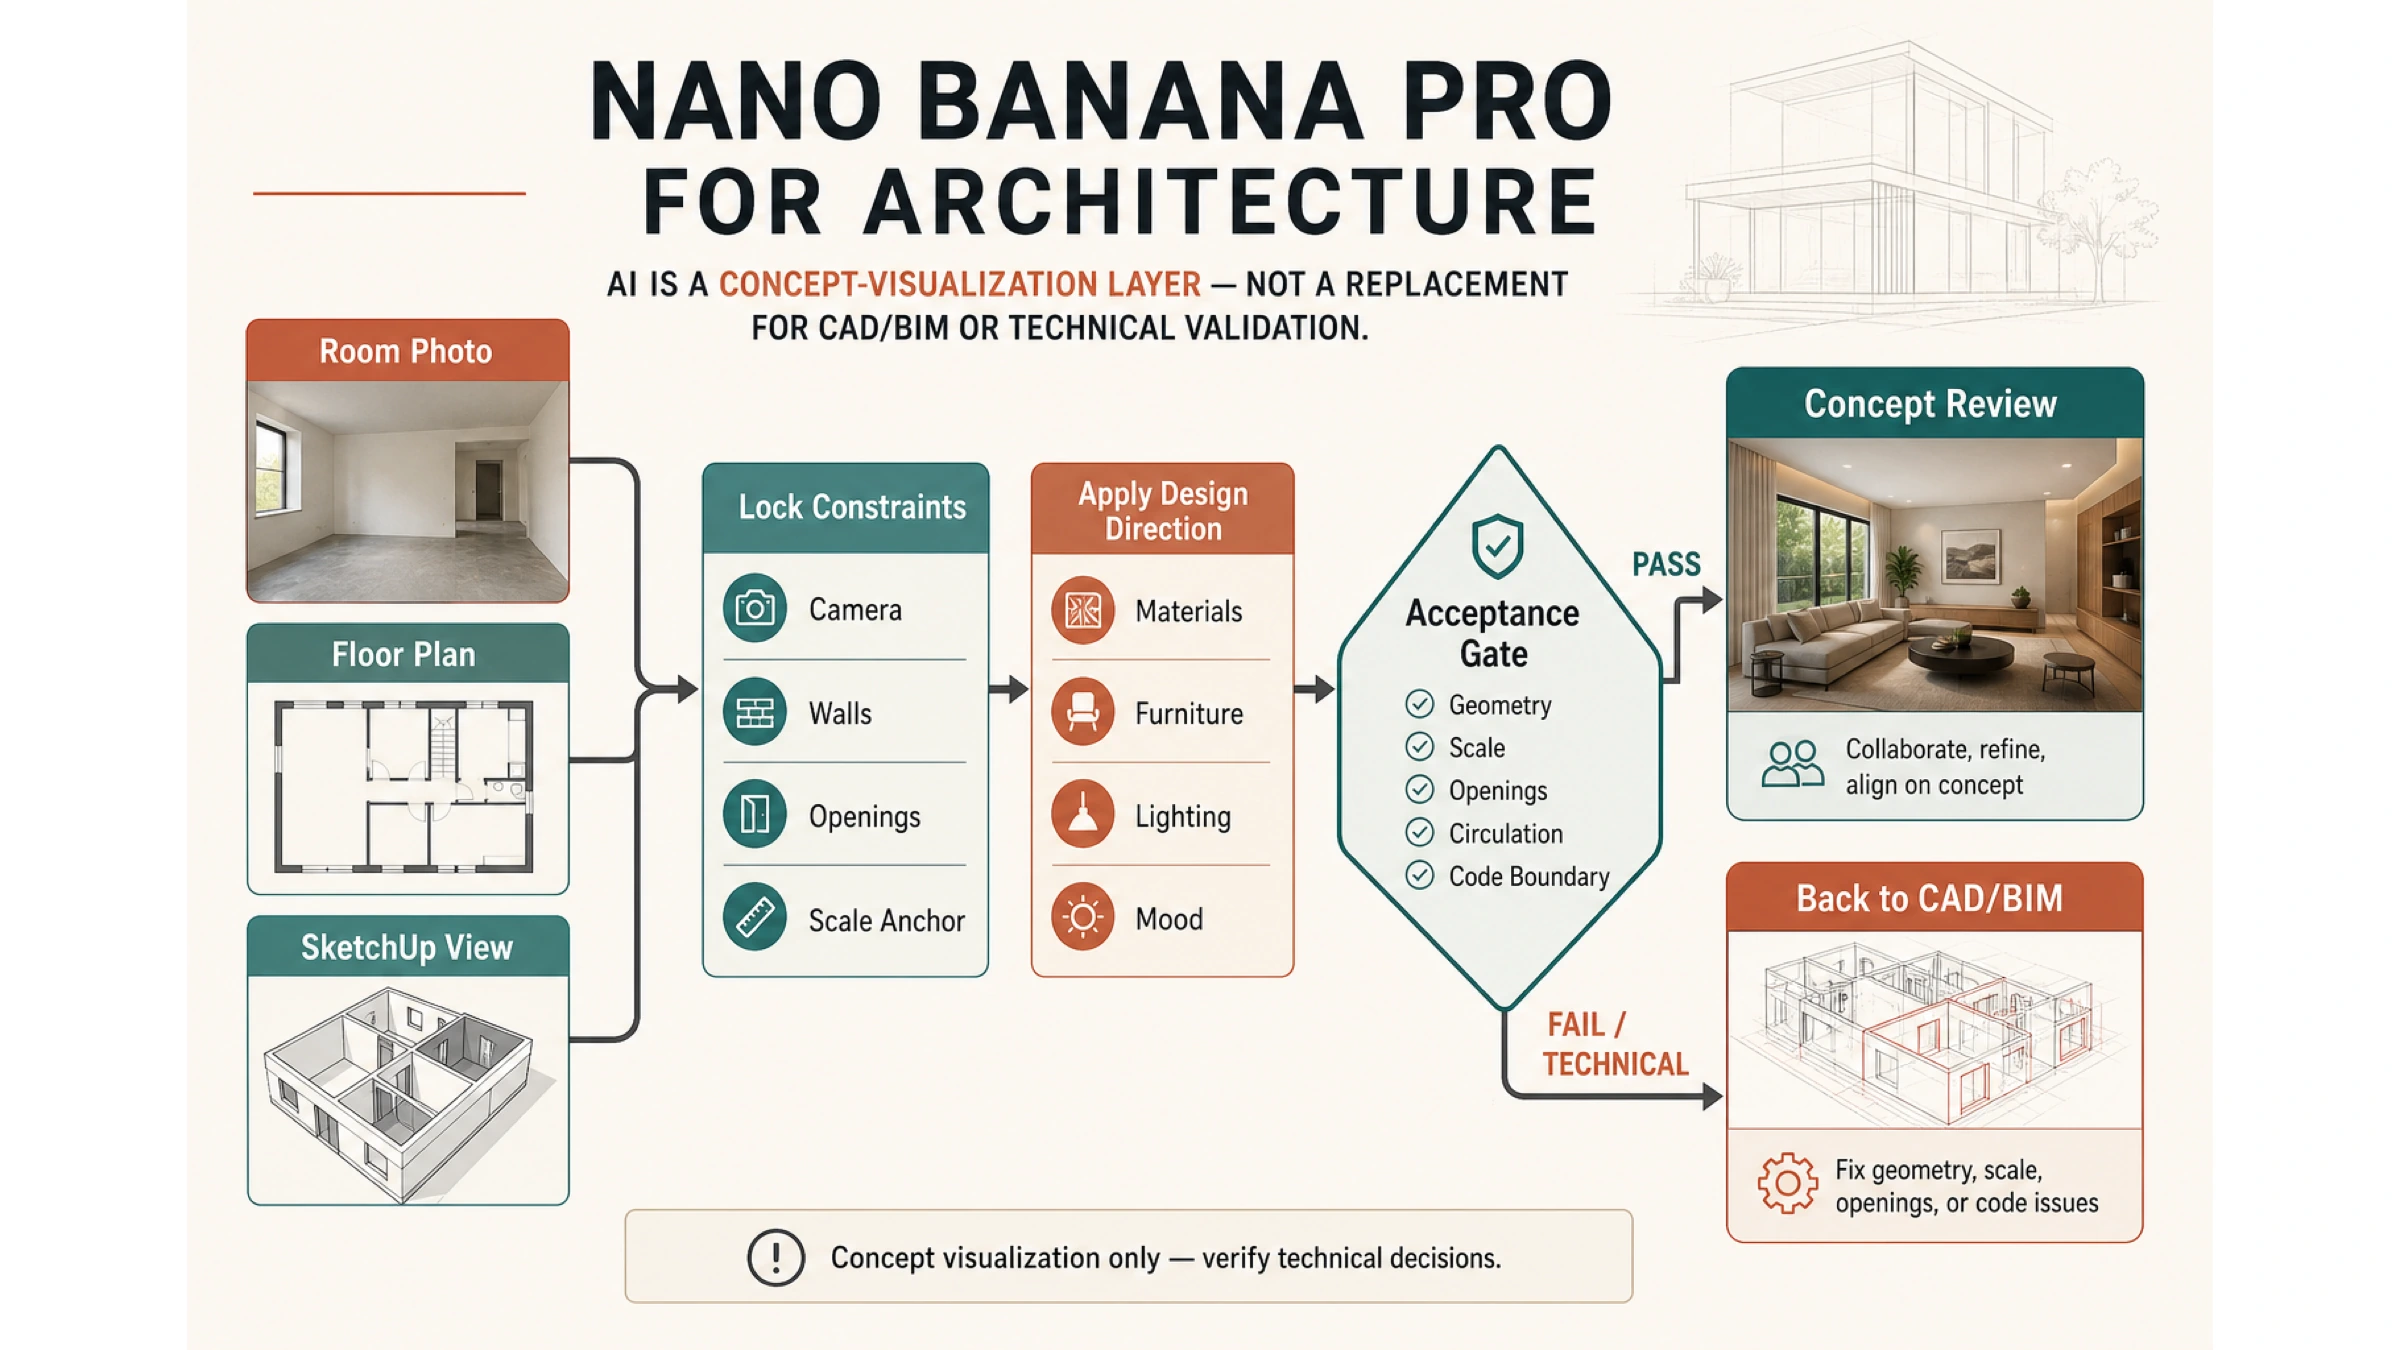
Nano Banana Pro can help you develop interior concepts from a room photo, floor plan, or exported 3D view. Start with the existing space, specify which elements stay fixed, and request a clearly bounded design change. Compare the result with the source before using it in a client presentation.
The useful output is a visual direction: a finish palette, a furniture arrangement to investigate, or an atmosphere to discuss. Measurements and the coordinated design remain in your CAD or BIM model. A convincing perspective image does not establish that a proposed cabinet fits or that another view shows the same building.
Google identifies Nano Banana Pro as Gemini 3 Pro Image, with the current API model ID gemini-3-pro-image. It supports image editing, multiple references, and 1K, 2K, or 4K output through the developer API. Those capabilities make it a candidate for complex concept work; they do not guarantee architectural accuracy. Google's image-generation documentation
Choose a source that answers the design question
Use the input closest to the decision you want to make. An existing-room redesign and a new building's interior require different starting information.
| Starting input | A useful concept task | Prepare it before uploading |
|---|---|---|
| Room photo | Explore finishes and loose furniture in an existing space | Use a clear, unobstructed view; identify fixed openings, services, and built-ins |
| Floor plan | Discuss zoning or a top-down furnishing idea | Keep the scale and room labels legible; provide heights and a separate view if they matter |
| SketchUp or other model viewport | Explore the appearance of a design already modeled | Export a fixed camera view with the shell, major objects, and intended proportions visible |
A plan alone leaves ceiling heights, window elevations, and camera position unresolved. An eye-level image generated from it fills those gaps with assumptions. If your client needs to compare two finish options from the same viewpoint, establish that viewpoint in the model first.
For an exterior concept, the same principle applies: give the model your intended massing and camera view before asking for cladding or landscape changes. Keep other elevations and site relationships in the measured project rather than inferring them from the generated facade.
Before uploading, remove client names, addresses, faces, security details, and irrelevant drawings. Use only material that you are authorized to share with the service. Select the account and data terms before sending confidential project files; the privacy differences are explained below.
Build a concept brief the model can follow
Describe the existing architecture before the desired style. In Joanne Pereira's published Design Ink workflow, a style-led request changed windows and proportions. A more descriptive account of the existing shell improved preservation in her examples. She also reported that a complete reference room could bring its layout into a model view. These are practitioner observations, rather than a current controlled benchmark, but they suggest a useful way to organize your inputs.
Give each reference one job:
- Base image: establishes the room, camera, and fixed elements.
- Material reference: supplies color, grain, texture, or sheen. Crop to the material when the surrounding room is irrelevant.
- Furniture reference: supplies the appearance of a proposed piece. Keep its real dimensions in your specification.
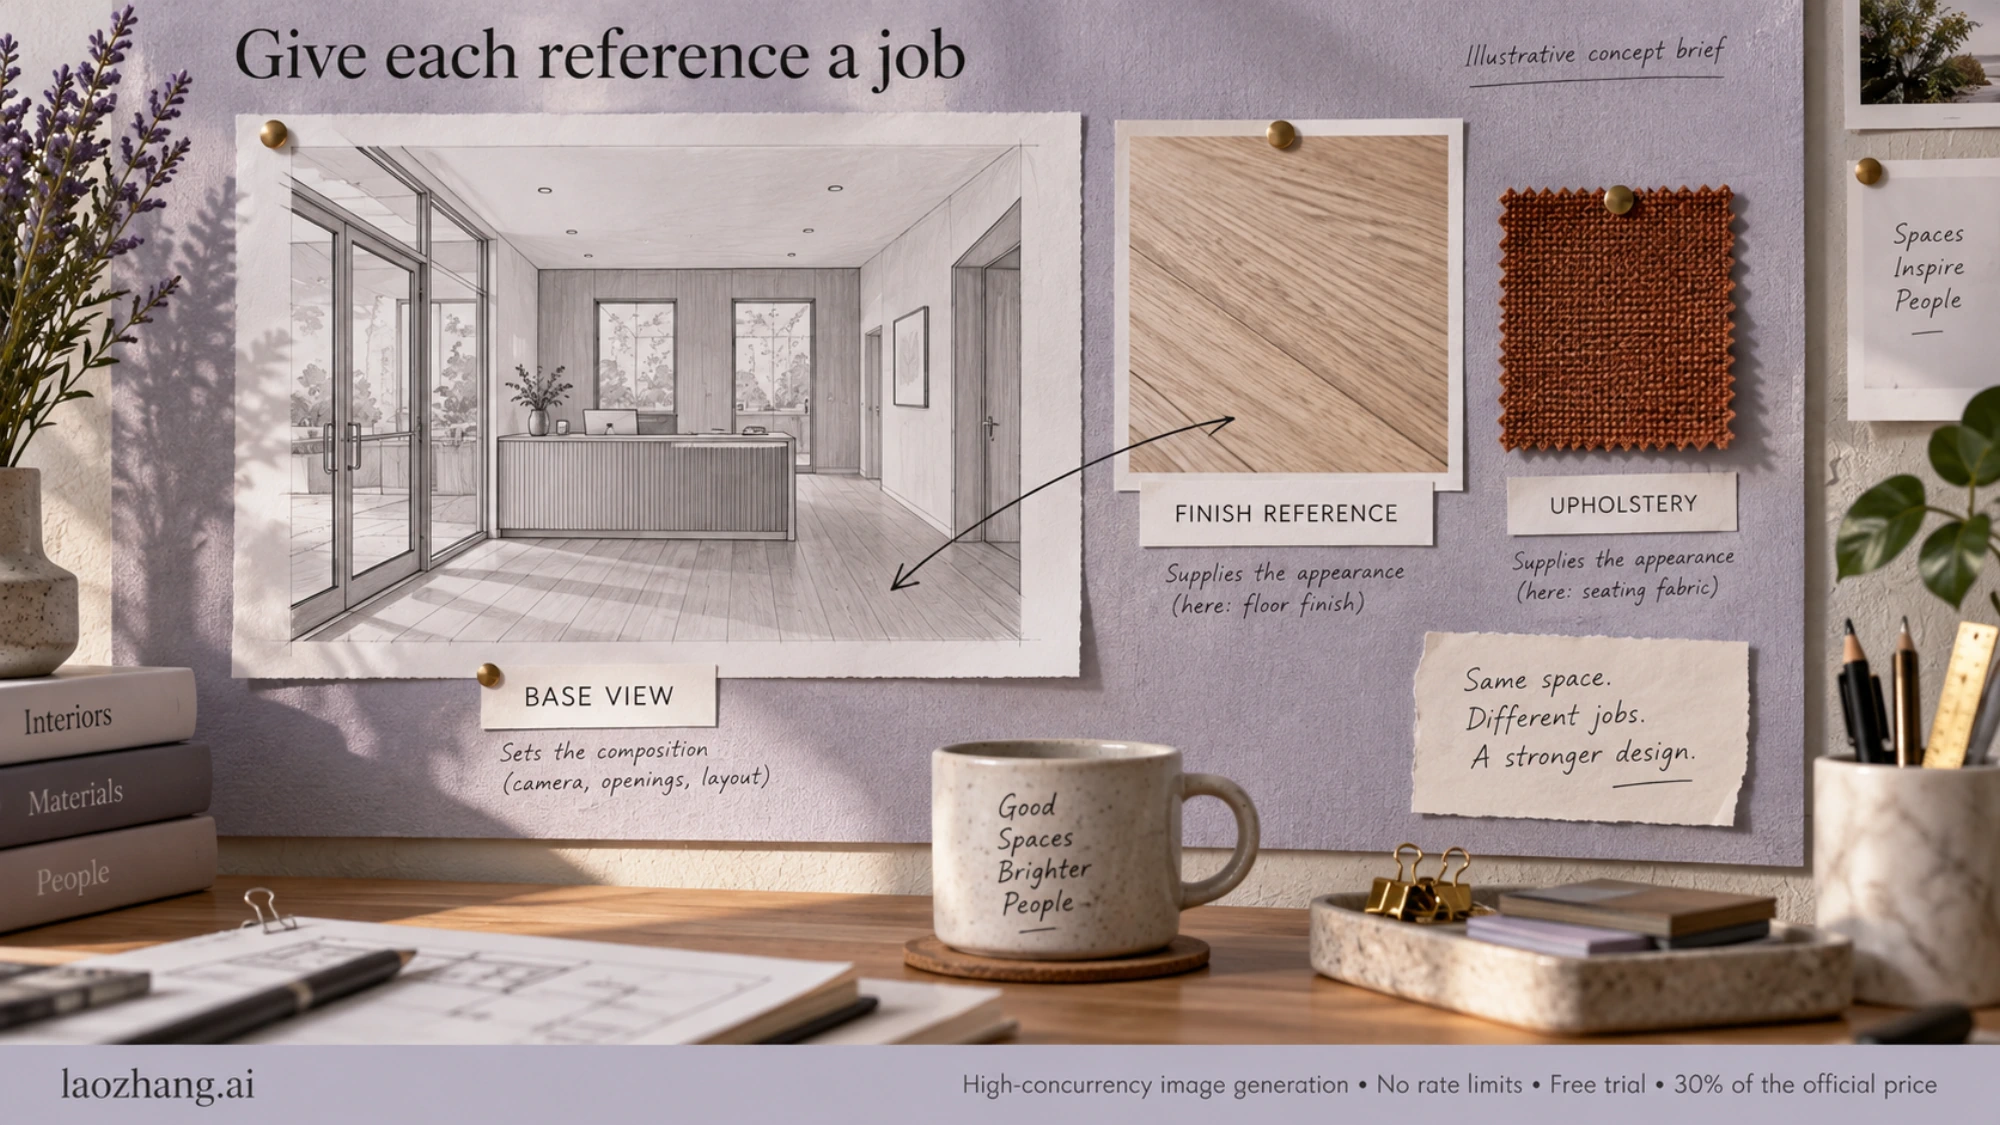
A reference board separates the room view from finish and upholstery samples. Editorial illustration.
The total number of references is less useful than whether their roles are unambiguous. Begin with the base view and the references needed for this decision. A larger bundle can introduce competing layouts and styles.
Example: refresh a small office reception area
Suppose you have a model view of a reception area with a glazed entrance on the left, two rear windows, an existing reception counter, and a corridor on the right. The project question is whether a warmer finish palette will make the waiting area more welcoming without changing the layout.
The following is an illustrative prompt you can adapt, not a record of a generation test:
Create an interior concept using the first image as the base view. The space has a glazed entrance on the left, two windows on the rear wall, a fixed reception counter, and a corridor opening on the right. Keep the viewpoint, room proportions, openings, counter, and corridor unchanged. Use the second image only for the color and grain of the pale oak finish; do not copy its room layout. Apply pale oak to the waiting-area floor and a warm off-white finish to the wall behind the seating. Keep the existing chairs and lighting. This is a finish study for a client discussion.
This request has a decision you can evaluate: whether the finishes work together in the existing reception area. It also identifies what would invalidate the comparison. If the corridor narrows or the counter grows, the image has changed more than the proposed finishes.
For a second direction, return to the same source and change the finish instruction. Keep the viewpoint and unchanged elements identical in the request. Comparing alternatives derived from different rooms or camera positions makes a material decision harder to interpret.
Refine one part while keeping a usable version
Once a candidate expresses the intended finish direction, save it before editing. Use that saved candidate as the basis for a specific follow-up, such as:
In this concept image, change only the upholstery of the two waiting chairs to a muted rust fabric. Keep their shape, position, and size relationship unchanged. Preserve the floor, walls, counter, openings, viewpoint, and lighting.
Google documents conversational local editing as semantic masking: you describe the part to change. This is an instruction to the model, not a guarantee that every surrounding pixel or building element stays untouched. Google's local-edit guidance
Inspect the whole image after the edit. A correct chair color is not enough if the model also changes the window mullions. If the edit damages a previously useful concept, return to the saved version rather than building further changes on top of it.
Separate questions that need separate comparisons. A brighter daylight scene can help a client discuss atmosphere, but it cannot establish illumination levels. An exact furniture reference can help communicate appearance, but its fit still needs a dimensional check. Specify actual products and lighting in your design tools once the visual direction is chosen.
Compare, save, and return the decision to the design model
Put the source and candidate side by side at the same display size. Check the features that would change the client's interpretation:
- Count doors, windows, columns, and other fixed elements. Check their position and proportions against the source.
- Trace the ceiling and floor boundaries, corridor, and main sightlines. Look for added space, moved walls, or a changed camera.
- Compare major objects and a known size reference. A plausible visual relationship is useful for discussion; it is not a measurement.
- Identify invented details: joinery, outlets, fixtures, structural connections, or furniture that was never requested.
- Decide whether the image answers the original question. A beautiful result that substitutes a new layout does not answer a finish study.
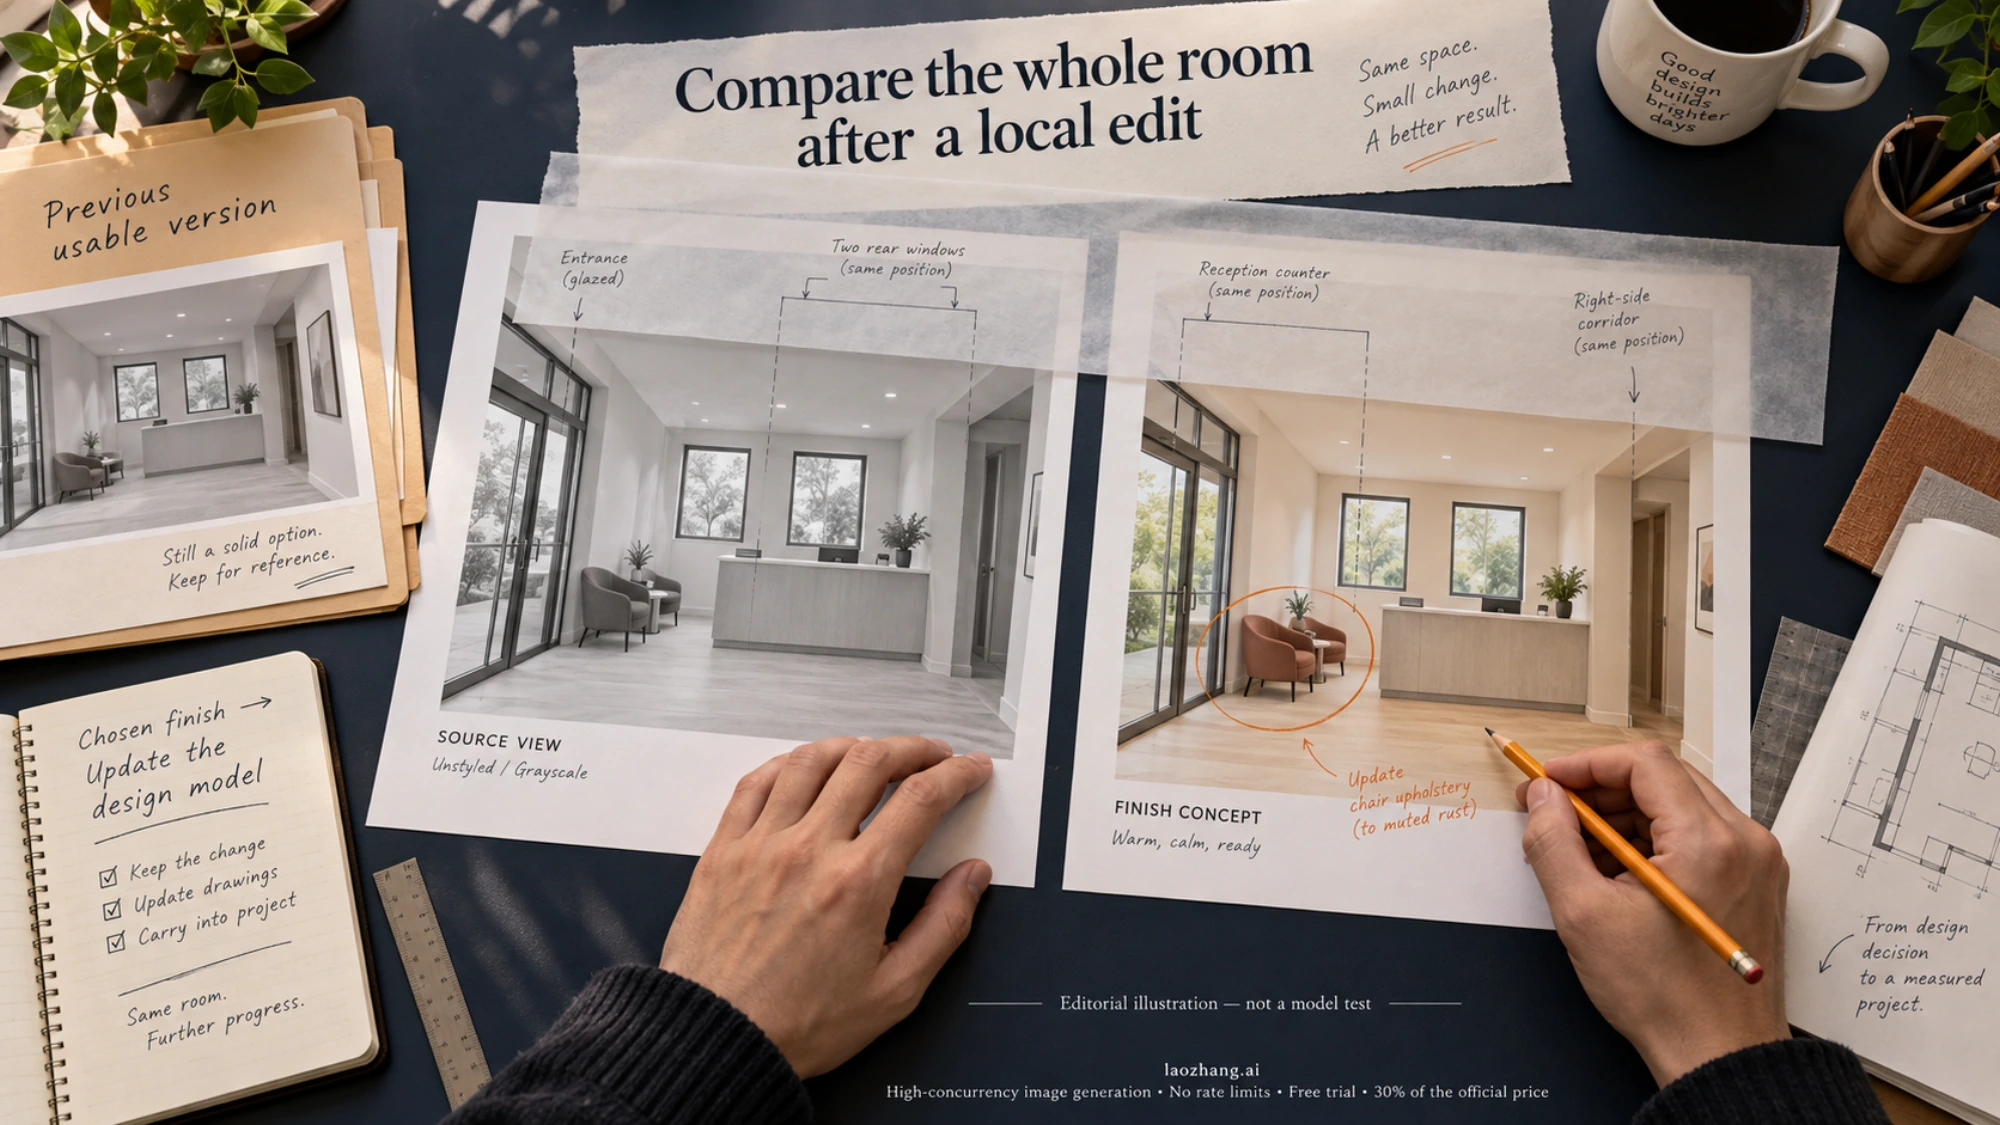
Compare the whole scene, retain a usable version, and record the chosen change. Editorial illustration.
Keep a candidate when it communicates the intended direction and preserves the features needed for that discussion. Reject it when a changed feature would mislead the client. If camera, massing, or openings keep drifting, return to the source model or use a controlled renderer for that view. There is no useful universal number of prompting attempts.
Save the accepted image with its source view, prompt, reference filenames, model or tool name, and a short note on the chosen design direction. Label it concept visualization in the presentation. Carry the decision—such as the preferred oak finish—back into CAD/BIM and specifications, then verify dimensions, circulation, services, and buildability through the normal project process.
Download the full-size asset rather than taking a screenshot. In Gemini Apps, Google documents Download full size on the image. Its help page currently describes 1K downloads without an AI plan and 2K with a plan; API 4K capability does not imply a 4K App download. Gemini Apps image help
If an accepted concept needs a wider composition for a slide, see how to expand an image while keeping the original available. Treat the added surroundings as presentation content; they do not establish unseen architecture.
Choose an access route before budgeting iterations
For individual concept work, start with the Gemini App if its available image tools and data terms suit your project. Choose the official developer API when your studio needs an automated workflow or explicitly controlled API model and output size. A third-party tool can provide a different interface or billing arrangement, but its contract needs a separate assessment.
Gemini App: check Pro availability on your account
Google's image help describes editing an uploaded image, opening a saved image through Library → Chat, and using More → Redo with Pro when eligible. Editing requires age 18 or older and supported account, language, and country availability.
Personal-account access is changing in October 2026. Google's change notice says no-plan users move to Auto starting October 9; AI Plus users receive their own effective-date email. Its post-change table gives Plus Flash-Lite and Flash, while Pro and Ultra also have Pro. The US subscription page, checked October 11, still lists Pro access on the Plus card. Because those descriptions differ, confirm the model and Redo with Pro control on your account before buying a plan for this workflow. Paying for any plan does not establish that Pro image regeneration is available to you.
The same US personal-plan page displays $4.99/month for Plus, $19.99/month for Pro, and $99.99/month for Ultra 5x or $199.99/month for Ultra 20x. These are USD public monthly prices; account location, taxes, and offers can change checkout terms. The page also advertises limited Nano Banana Pro access in the separate Google Flow product. That does not establish free Pro access in the Gemini App or API.
The change notice describes compute-based limits with five-hour refreshes and a weekly limit, rather than a fixed image allowance. Plan comparisons therefore do not tell you how many acceptable room concepts a subscription will produce.
API: count rejected concepts in the budget
As checked October 11, Google's Standard pricing for gemini-3-pro-image has no free tier. It lists image-output equivalents of $0.134 for a 1K/2K image and $0.24 for a 4K image. Inputs, text/thinking output, and applicable search charges add to the total. Batch and Flex list different rates and should be evaluated as separate processing choices. Official Gemini API pricing
For an illustrative budget, eight Standard 2K outputs have an image-output component of 8 × $0.134 = $1.072, before those additional charges. If only two answer your design question, that component is $0.536 per accepted concept. These assumed counts are not a measured success rate. Budget for discarded and edited candidates as well as the final presentation image.
LaoZhang's public Pro editing documentation, dated September 24 and checked October 11, lists $0.09 per call at any supported size and charges every HTTP 200 response, including one without an image. LaoZhang is the brand behind this publication. This is its provider-stated billing contract, not Google's rate or an independently verified model, reliability, or billing test. Consider that route only if its interface, failure billing, and data arrangements meet your project's requirements.
Disclosure: laozhang.ai is our own service. Its prices are platform pricing, not an independent comparison.
Keep client material under the right data terms
Decide which files may leave the studio before generating a concept. Redaction helps, but an unpublished plan can remain confidential even without an address.
For personal Gemini Apps, Google's Privacy Hub explains that temporary chats and chats with Keep Activity off are retained for 72 hours. Human review can still occur for protection and safety purposes; reviewed chats can be retained for up to three years. Turning activity off is not a confidentiality guarantee. Work or school licenses may have different terms.
For the developer service, Google's API terms say Paid Services do not use prompts and responses to improve Google's products, but retain limited safety-policy logs. API Paid Services require an active billing project. Unpaid Services generally permit improvement use and human review, with different handling specified for the EEA, Switzerland, and UK. A consumer subscription does not determine an API project's data treatment.
For a third-party service, check its own retention, downstream processing, and client-data permissions. Google API terms do not automatically describe a wrapper's handling. Keep restricted files in approved tools when those arrangements cannot be established.
Google's API generated-content clause says Google does not claim ownership of generated content. It does not settle rights in supplied reference images, exclusivity, or every jurisdiction's copyright rules. Obtain the necessary permissions for project and product references before using them.
Frequently asked questions
Can Nano Banana Pro turn a floor plan into a 3D model?
It can generate an image that looks like a 3D view. That image is not an editable CAD/BIM model with verified dimensions. For a finish study, establish the geometry and camera in your modeling tool, export the view, and use it as the visual starting point.
What should I do when a local edit changes the room?
Return to the last usable saved image and narrow the requested change. Compare the new result with the source again. If fixed geometry continues to drift, make the change in the model or renderer rather than accepting a room that differs from the project.
Is Nano Banana Pro better than a renderer for interior design?
Use it for exploratory images and visual discussion when you can review the result against a source. Use a renderer tied to your model when the deliverable depends on consistent viewpoints, modeled products, or controlled scene information. The sources here do not establish a universal speed or quality advantage over V-Ray, Enscape, or other renderers.
Sources8
External pages this guide links to, in the order they appear. Last updated Oct 11, 2026.
Sources8
External pages this guide links to, in the order they appear. Last updated Oct 11, 2026.
- 1.Google's image-generation documentationai.google.dev/gemini-api/docs/image-generation
- 2.Joanne Pereira's published Design Ink workflowdesigninkco.com/blog/nanobanana-pro-workflows
- 3.Gemini Apps image helpsupport.google.com/gemini/answer/14286560
- 4.Google's change noticesupport.google.com/gemini/answer/17004136
- 5.US subscription pagegemini.google/us/subscriptions
- 6.Official Gemini API pricingai.google.dev/gemini-api/docs/pricing
- 7.Google's Privacy Hubsupport.google.com/gemini/answer/13594961
- 8.Google's API termsai.google.dev/gemini-api/terms