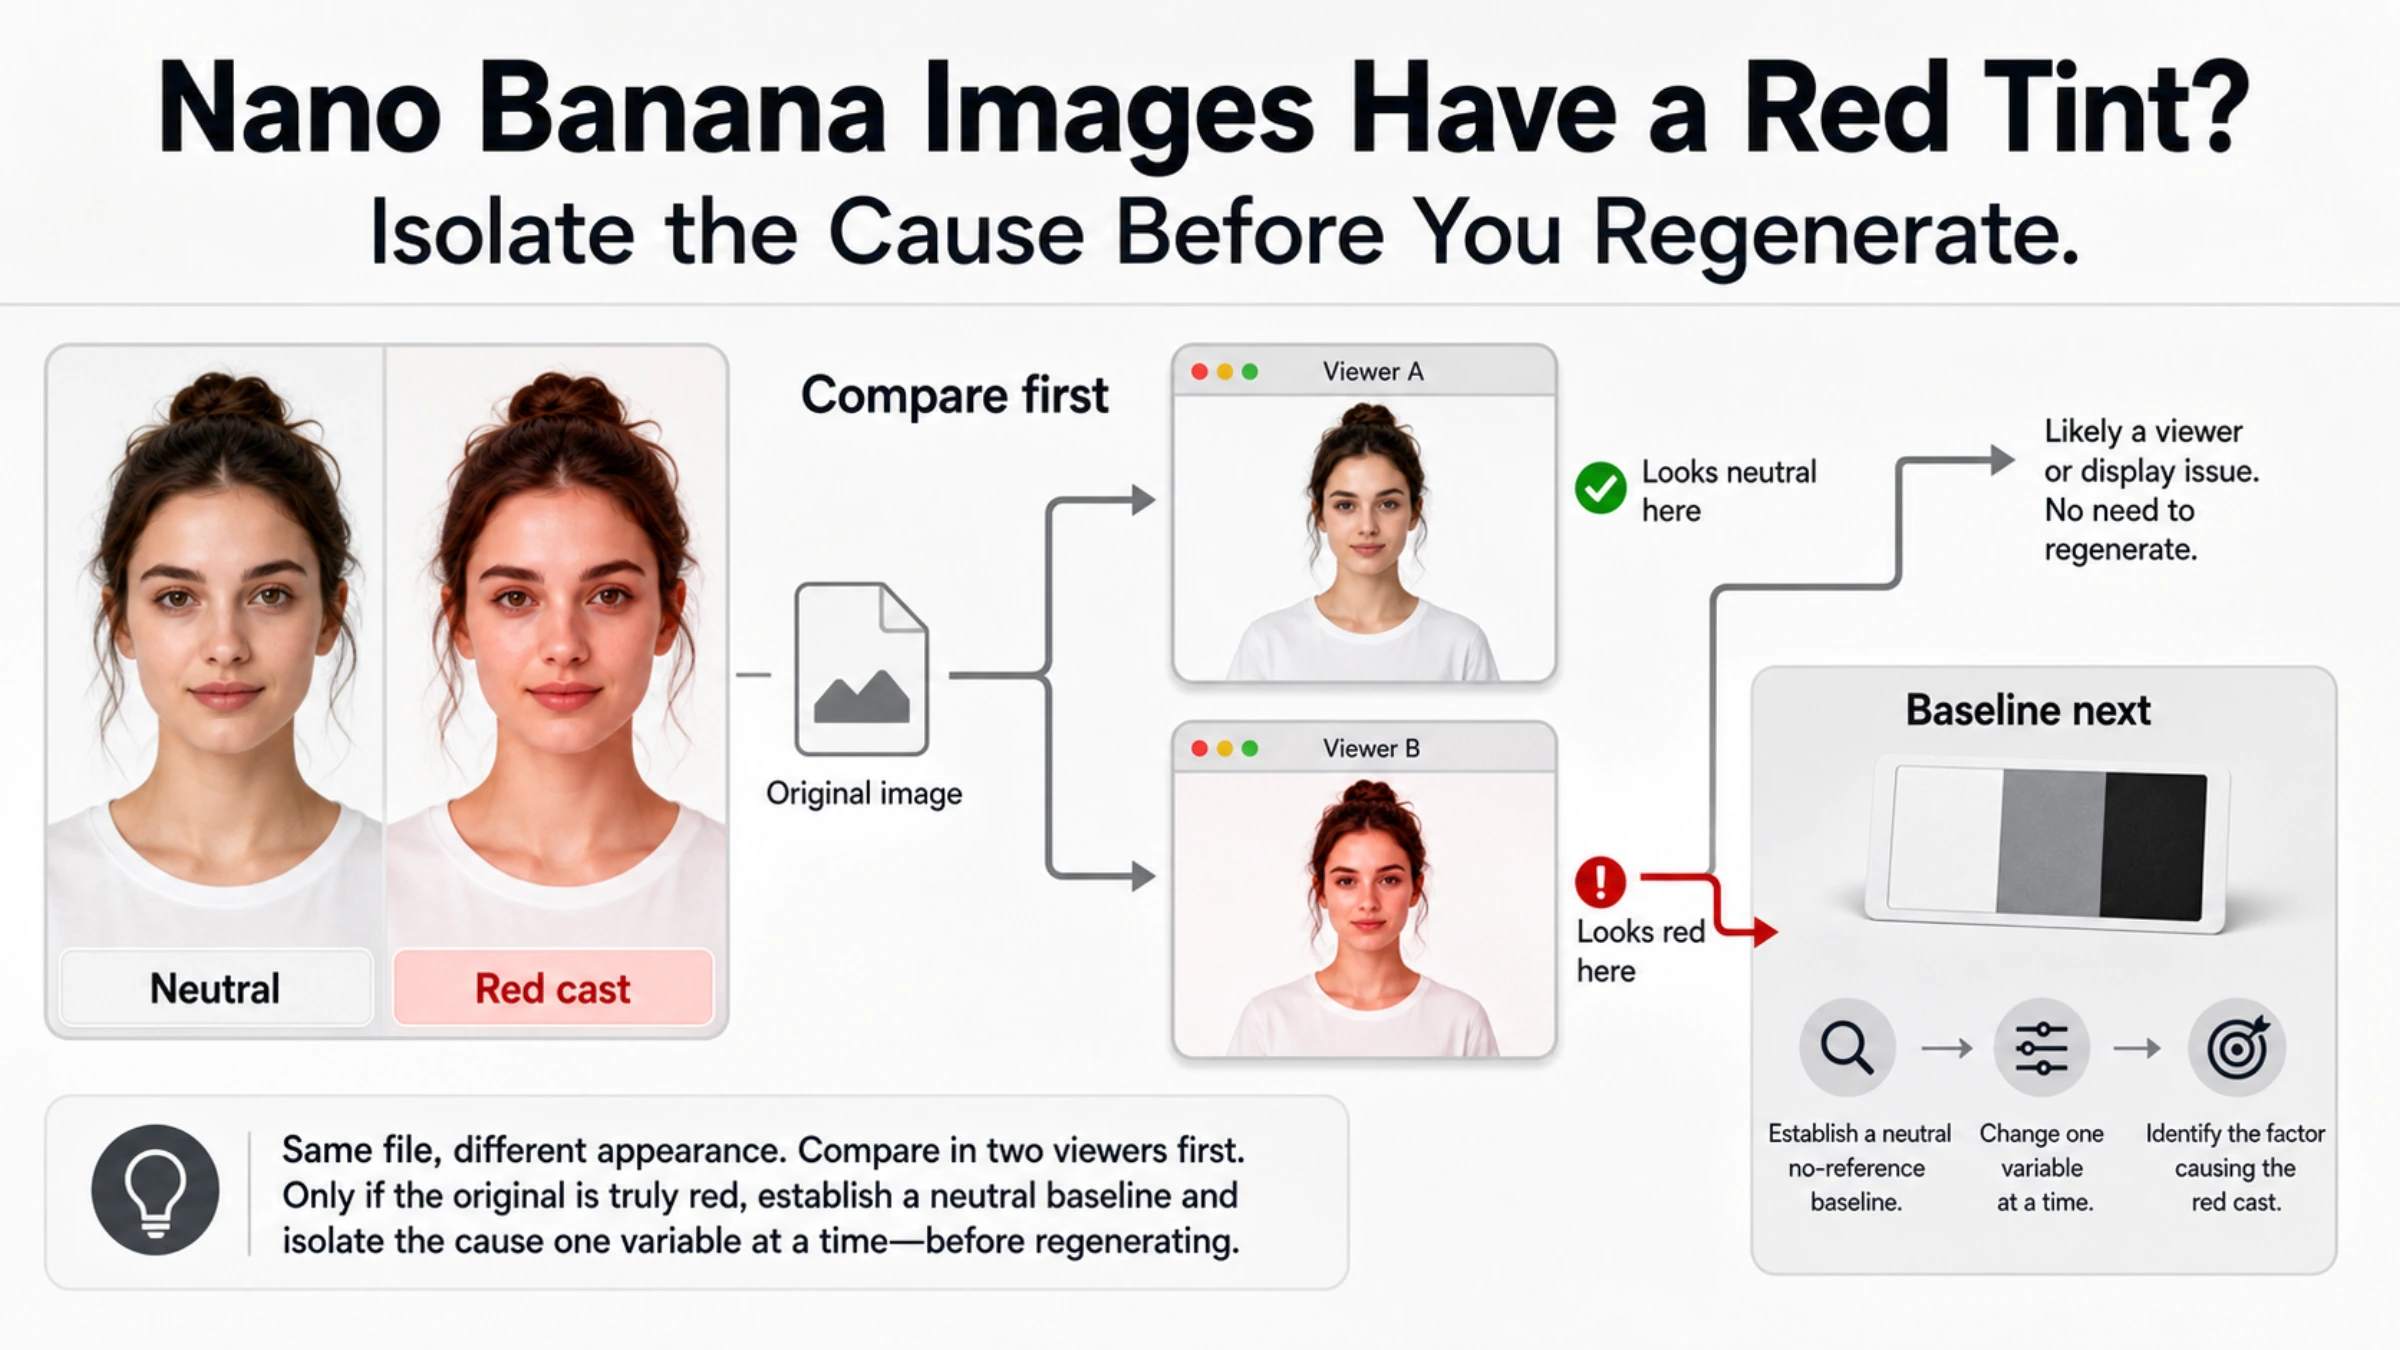
When a Nano Banana image has a red tint, the first useful question is not “Which magic prompt fixes it?” It is whether the red cast is actually in the downloaded pixels. Save the original PNG or JPEG and open that same file in two color-managed viewers. If it looks red in only one app, investigate the viewer or embedded color profile. If it looks red everywhere, isolate the prompt, reference images, and edit history.
Google currently uses Nano Banana as the family name for several Gemini image models and documents text-to-image, image editing, and conversational iteration in its official image-generation guide. Google does not document red tint as a universal known issue across that family. A red result can be real without proving that every model, surface, or request has the same defect.
The 60-second fork: is the file red, or only the preview?
Keep the first downloaded file untouched. Do not diagnose from a screenshot, a messaging-app copy, or an image that has already been exported through another editor.
- Open the original in a desktop browser and a color-managed image editor.
- Check the same original on a second device if possible.
- Compare neutral objects: a white shirt, gray wall, eye whites, or product background. Do not judge from skin alone.
If only one app looks red, a profile or display interpretation is a stronger first suspect. An embedded ICC color profile tells software how the file's color values should be interpreted. Adobe warns that without an embedded profile, applications can interpret the same values differently and produce unwanted shifts; see its guide to embedding color profiles.
This check does not clear the model. It simply prevents you from regenerating an image whose pixels were already fine.
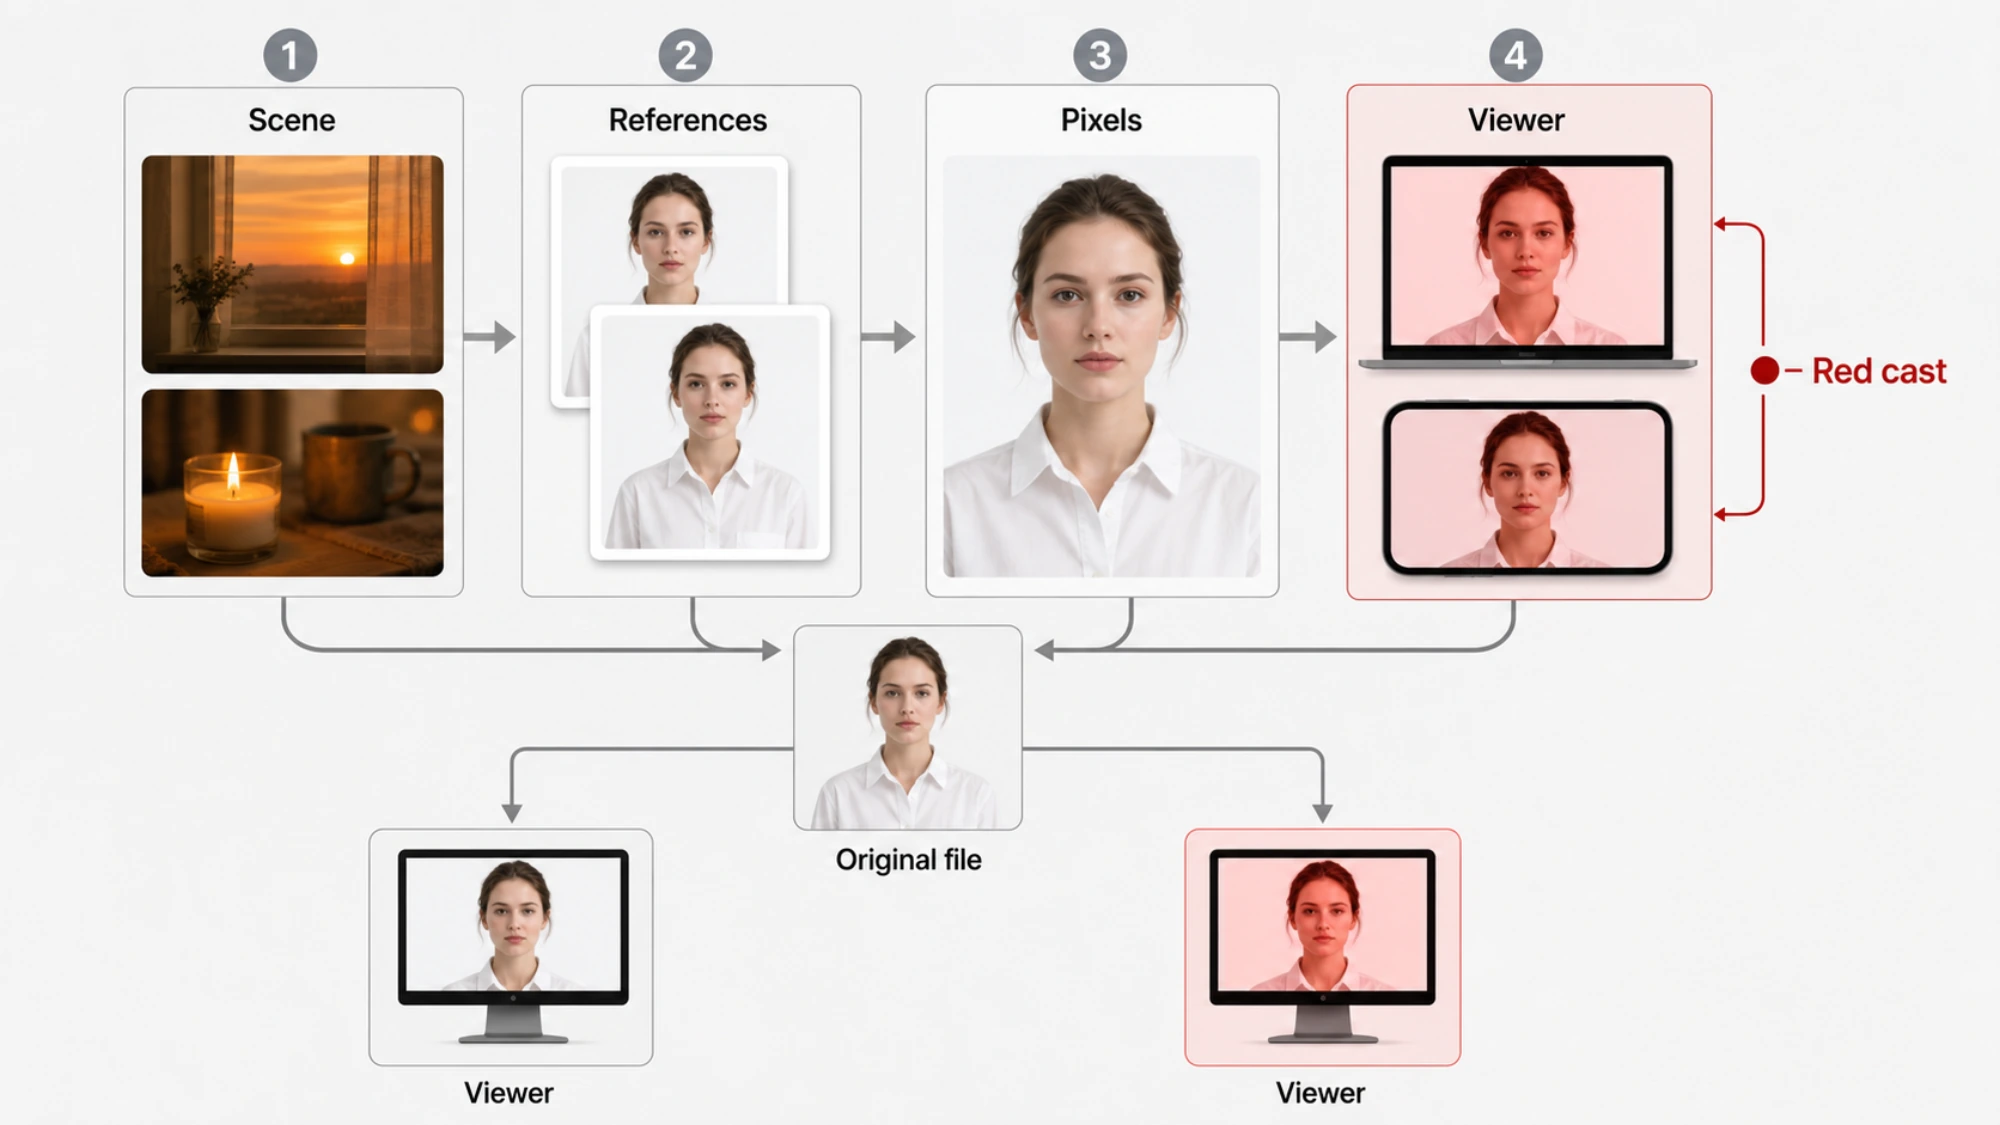
Four different causes can look like the same red cast
A warm scene can tint the whole image because the prompt asked for sunset, candlelight, amber ambience, or cinematic warmth. A reference can bring its own white balance or saturation into an edit. A generation can alter global color while harmonizing a new object with the scene. Finally, one viewer can display a file differently because its color-management path differs.
Once those layers are clear, this table becomes useful:
| What you see | Best first hypothesis | Next test |
|---|---|---|
| Red in one app, neutral in another | Viewer, display, or embedded profile | Compare the untouched original and inspect its profile |
| Red from text-to-image with sunset or warm-light language | Scene intent is tinting neutrals | Run a neutral daylight baseline |
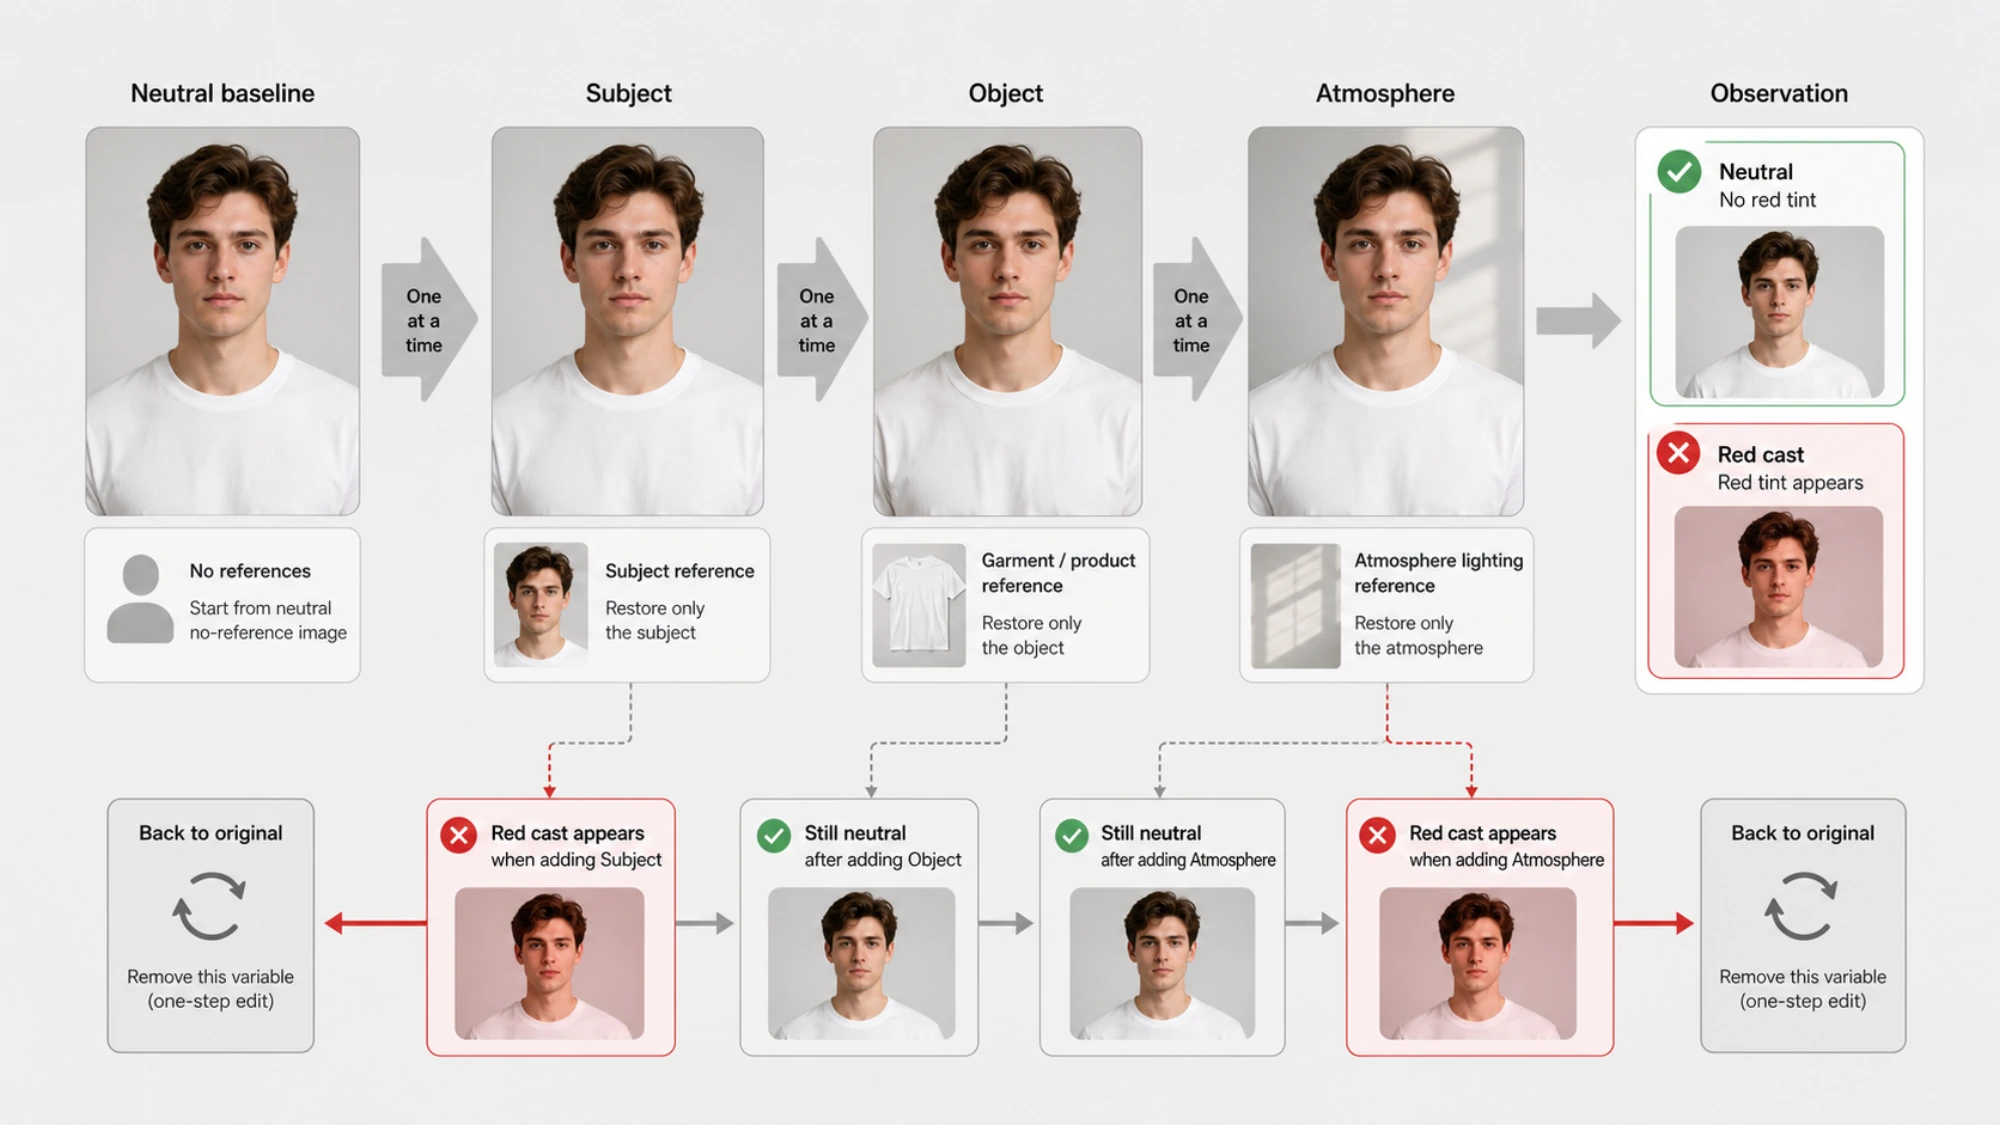
| Neutral without references, red after adding one | Reference white balance or relighting | Add one reference at a time |
| First result is fine, later edits grow warmer | Color drift across repeated regeneration | Return to the last neutral original |
| Clothing changes, but skin becomes red/blotchy and the background shifts | Global harmonization affected more than the garment | Reduce the edit to one named target |
| The same input differs across explicit model IDs | A model comparison is worth preserving | Save both originals and exact requests |
A Nano Banana Pro and Nano Banana 2 user reported increased saturation, reddish or blotchy skin, and a slight background shift during virtual try-on in this documented Reddit report. That is a useful description of the failure shape—only the clothing should change, but the entire grade moves. It is still one self-reported case, not a controlled benchmark or proof of a specific internal cause.
Build a neutral baseline with no reference image
Open a fresh interaction. Do not upload a reference and do not continue from an image that has already passed through several edits. Choose a scene with obvious neutral anchors: a light-gray background, white clothing, neutral daylight, and no colored practical lights.
Use this as a starting prompt:
textCreate a photorealistic half-length portrait against a light neutral-gray background.
The subject wears a pure white shirt under neutral daylight.
Use natural white balance and restrained saturation.
Keep whites neutral and grays free of red, magenta, yellow, or orange casts.
Do not apply sunset light, candlelight, neon spill, vintage grading,
orange-and-teal grading, a warm filter, or a cinematic LUT.
Google's prompt guidance recommends describing the scene and lighting with specific detail rather than relying on a loose keyword list; see its image prompting strategies. The test is not based on a mystical “neutral” token. It removes common warm-scene instructions and gives you visible reference points.
If this baseline is neutral, restore one variable at a time: first the subject reference, then the garment or product reference, then the atmosphere. The first step that introduces the cast identifies the most useful place to intervene. If the clean baseline is still red, record the exact model or product surface before comparing another model.
For image editing, define the target—not only what must stay unchanged
Virtual try-on and product replacement create a conflict. You want the new object to fit the scene, so the model may relight or harmonize more of the frame. A vague “keep the person unchanged” is less precise than the transformation request.
Google's targeted editing template similarly tells the model to change only a named element while preserving the original style, lighting, and composition. This is good prompt structure, but it is not a deterministic pixel mask and does not guarantee that every untouched pixel will remain identical.
For a garment replacement, try:
textChange only the subject's current top to the blue jacket in the reference image.
Preserve the subject's identity, facial features, hair, skin hue, and skin luminance.
Preserve the original background, camera exposure, white balance,
key-light direction, and shadow color.
Do not regrade the full image, increase saturation, or add a warm filter.
Match the jacket to the existing light; do not relight the person or background.
If the output is still red, do not keep correcting that derivative with “make it cooler.” Return to the original and repeat the single garment change. Correcting a red derivative can leave you with gray skin and a background that is still warm, while destroying the clean comparison.
If each edit gets redder, go back to the last neutral download
Conversational editing is a documented Nano Banana capability. It is not a nondestructive layer stack. A later edit can regenerate more of the frame than the user intended.
Use a simple recovery rule:
- Find the most recent downloaded result with acceptable color.
- Start a fresh edit from that file only.
- Change one object or region.
- Download the new original and compare it side by side.
- If global color moves, reject that branch and return to the neutral file.
For API testing, record the exact model ID. Google's current guide lists gemini-3.1-flash-lite-image, gemini-3.1-flash-image, gemini-3-pro-image, and the older gemini-2.5-flash-image under the Nano Banana family. “Nano Banana” alone does not tell a teammate which model produced the file. On a consumer surface without a visible ID, a fresh chat, the original image, and one edit provide the closest practical isolation.
Export web images as sRGB—but do not treat sRGB as a color cure
After the pixels look correct, make the delivery predictable. Adobe recommends sRGB for online viewing and advises converting non-sRGB images to sRGB before saving web output; see its online color-management guidance. Use a proper “convert to profile” operation and embed the resulting profile. Merely assigning a different profile can change interpretation instead of preserving appearance.
sRGB reduces cross-app surprises. It does not remove a red cast already baked into the pixels. If a white wall has elevated red-channel values in the original, return to generation or controlled color correction.
Two common jobs need slightly different checks
Virtual try-on with reddish skin: verify that the base portrait and garment reference each look correct by themselves. Run a single-reference baseline, then perform only the garment replacement while locking skin hue, white balance, background, and light. If global color still changes, return to the base portrait and compare an explicit model rather than editing the red result again.
A white product background turns pink: use an eyedropper on the downloaded file. If the background pixels are close to neutral but one app looks pink, inspect color management. If the red channel is genuinely elevated across the background, restart from the clean product original and specify “neutral white background, no colored ambient spill, no warm grade” in the one-step edit.
For either job, keep five things together: model ID or product surface, untouched source image, complete prompt, edit number, and downloaded output. Those artifacts make a problem reproducible. A screenshot of a chat preview does not.
Stop generating when color is part of the contract
One neutral baseline and one tightly scoped edit are usually enough to decide whether a casual social image is salvageable. More attempts are the wrong tool when color has a hard acceptance threshold:
- brand assets with specified colors
- product images where fabric, finish, or white background affects purchase decisions
- paid portrait, wedding, or identity-sensitive work where skin tone needs approval
Use Nano Banana for composition and object changes, then finish white balance, curves, skin tone, and output profile in a color-managed editor. Generation and color management solve different parts of the job.
If you are unsure which model the Nano Banana name refers to, start with our current Nano Banana image-generator family guide. If the model is already known, the next action is smaller: save the original, run one neutral no-reference baseline, and reintroduce only one variable.