As of May 8, 2026, the safest OpenClaw install path is: use Node 24 when possible, keep Node 22.14+ as the minimum supported fallback, run the official installer for your platform, then complete openclaw onboard --install-daemon so the Gateway is configured as a managed local service. Do not stop at the install command. A working setup is only confirmed after openclaw gateway status shows the Gateway running, openclaw dashboard opens the Control UI, and your selected model provider responds from the same account or host that will run the agent.
This refresh replaces the old February version-specific advice with the current OpenClaw docs contract. The reader job is practical: choose local, Docker, VPS, or source install without breaking gateway.mode, auth, startup service metadata, or provider onboarding.
TL;DR
OpenClaw is a self-hosted Gateway that connects chat surfaces and control UIs to coding agents, model providers, local tools, and plugins. The fastest install is still simple, but the finish line has moved: install, onboard, verify the Gateway, then choose how it should stay online.
- Prerequisite: Node 24 is recommended; Node 22.14+ is still supported. The installer can handle Node for common paths, but checking
node --versionfirst prevents opaque package-manager failures. - Fast path: macOS/Linux/WSL2 use
curl -fsSL https://openclaw.ai/install.sh | bash; native Windows usesiwr -useb https://openclaw.ai/install.ps1 | iex. - Do this after install: run
openclaw onboard --install-daemon, choose a model provider, then verify withopenclaw gateway status. - Healthy signal: the Gateway should be listening, the dashboard should open with
openclaw dashboard, and a first Control UI message should return an AI reply. - Deployment choice: local service is best for testing and daily personal use; Docker/Podman/Nix/VPS paths are for isolation, repeatability, or always-on remote access.
- Do not guess local mode: if
~/.openclaw/openclaw.jsonexists but lacksgateway.mode, treat it as damaged config and repair it withopenclaw doctoror onboarding instead of forcing a Gateway start.
Essential commands:
bashcurl -fsSL https://openclaw.ai/install.sh | bash # Native Windows PowerShell iwr -useb https://openclaw.ai/install.ps1 | iex # First-time setup with managed service install openclaw onboard --install-daemon # Verify the Gateway and config openclaw gateway status openclaw doctor # Open the Control UI openclaw dashboard
Minimum contract: Node 22.14+; Node 24 preferred. macOS, Linux, WSL2, and native Windows are supported, with WSL2 still the steadier Windows choice for the full agent workflow. For managed startup, use the daemon path instead of hand-rolling pm2 unless you intentionally own the supervisor.
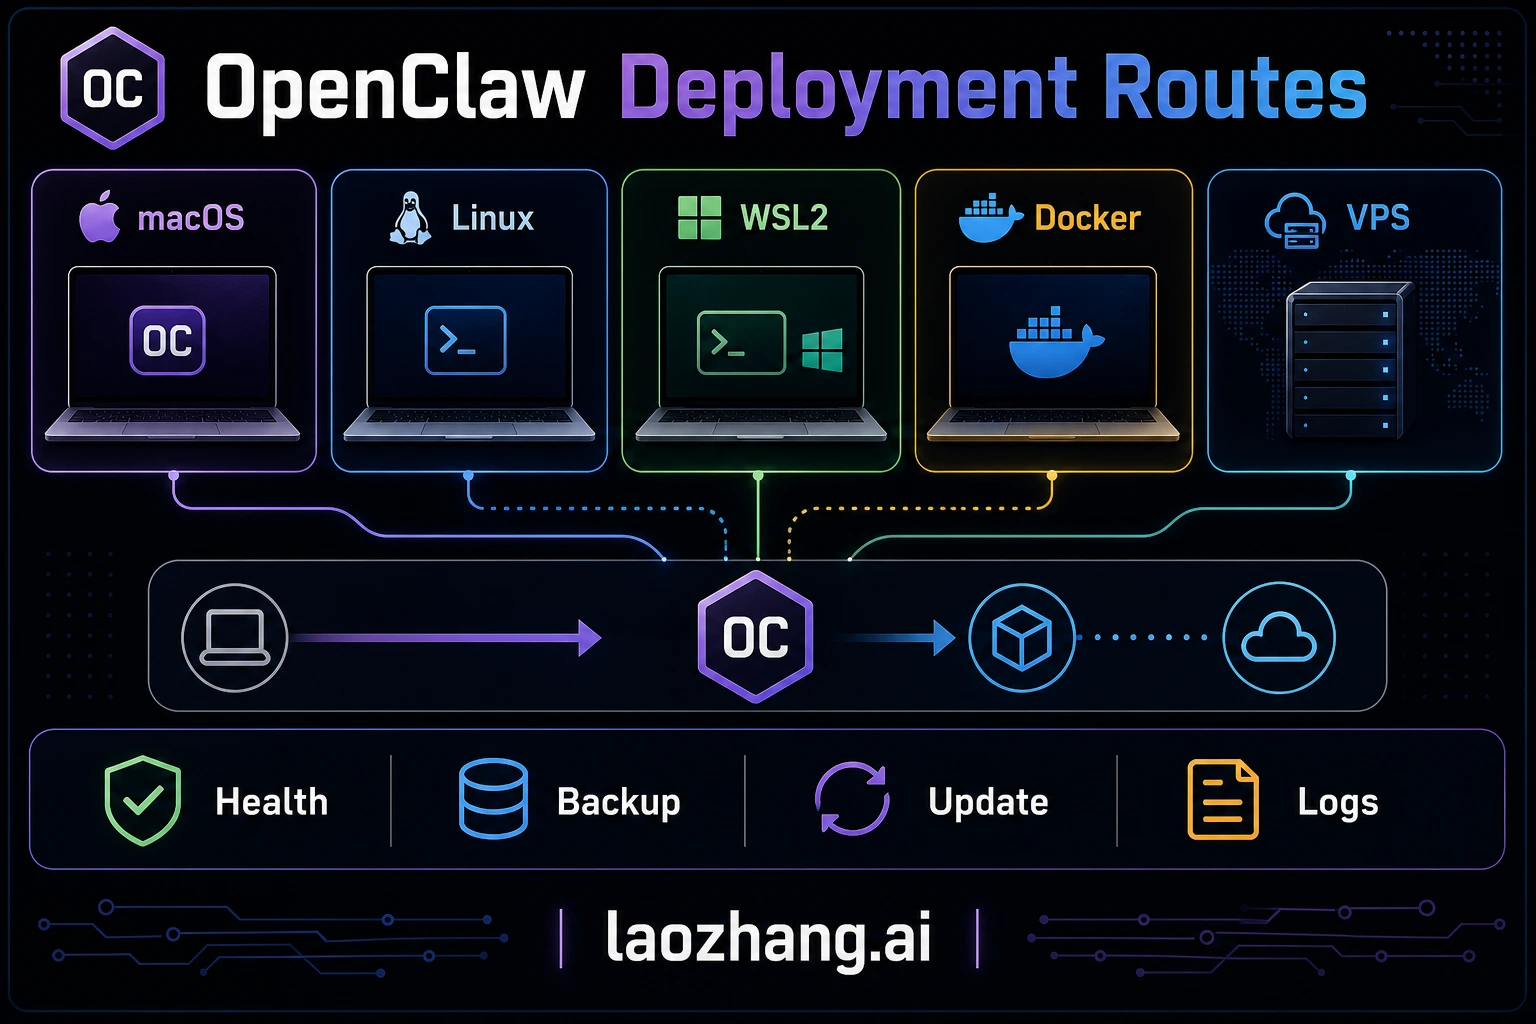
How to Choose Your OpenClaw Deployment Method
Most installation guides jump straight into commands without addressing the most important question first: which method should you actually use? OpenClaw exposes several install paths, including installer scripts, package managers, source builds, containers, Nix, Ansible, and experimental runtimes, but most users only need to choose between a local installer, a container deployment, or a developer-managed package install. The right choice depends on your hardware situation, your comfort level with the terminal, and whether you plan to leave the assistant running around the clock.
The Installer Script is the recommended starting point for anyone installing OpenClaw for the first time. It works on macOS, Linux, and WSL2; native Windows uses the official PowerShell installer. The current installer flow can install Node when needed, install OpenClaw, and launch onboarding. The important update is the daemon handoff: openclaw onboard --install-daemon writes the expected local Gateway configuration and installs the appropriate user-level startup path, such as LaunchAgent, systemd user service, or Windows Scheduled Task. Choose this method if you want a normal personal setup with the fewest moving parts.
Docker Compose provides process isolation, reproducible environments, and painless upgrades at the cost of slightly more complexity. The Docker deployment bundles OpenClaw with its own Node.js runtime inside a container, maps the gateway to 127.0.0.1:18789, and persists your configuration through Docker volumes. Updates become a matter of pulling the latest image and restarting the container rather than managing Node.js versions manually. This method is ideal for production VPS deployments, security-conscious operators who want container-level sandboxing, and teams running multiple services on the same server. You will need Docker Engine and Docker Compose installed beforehand, and a basic understanding of port mapping and volume mounts.
Native npm/pnpm/Bun Install is a middle ground for developers who already manage Node.js environments professionally. Running npm install -g openclaw@latest, pnpm add -g openclaw@latest, or bun add -g openclaw@latest gives you more control over package location and update cadence, but you still need openclaw onboard --install-daemon afterward if you want a managed Gateway service. For pnpm, approve global build scripts before onboarding. For most users, the installer script is preferable because it handles environment detection automatically.
The following comparison captures the key trade-offs. If you are optimizing for detailed strategies for managing OpenClaw API costs, keep in mind that the deployment method itself has minimal impact on API expenses — the real cost driver is which LLM you connect and how frequently the assistant processes messages.
| Criteria | Installer Script | Docker Compose | npm/pnpm Global |
|---|---|---|---|
| Skill level | Beginner | Intermediate | Developer |
| Setup time | Shortest path when supported | Longer because you own volumes, ports, and images | Short if your Node toolchain is already healthy |
| Node.js isolation | Shared | Containerized | Shared |
| Always-on support | Use the managed daemon path from onboarding | Container restart policy plus host supervisor | Use the managed daemon path or your own supervisor |
| Update method | openclaw update | docker compose pull | npm update -g openclaw |
| Best for | Local testing and personal daily use | VPS, isolated hosts, or team-owned deployments | Developers with existing Node.js workflow |
| Cost owner | Existing machine and power/network | VPS provider invoice | Existing host or package-managed server |
Practical recommendation: Start with the installer script on a local machine to confirm your auth, gateway, and model route. If the assistant must stay online for other users or integrations, evaluate Docker Compose on a VPS or managed server you already trust. Validate health checks, backups, restart behavior, and provider credentials before calling the deployment production-ready.
Installing OpenClaw on macOS and Linux
Installing OpenClaw on macOS or a Linux distribution is the most straightforward path because both operating systems natively support the installer script and the underlying Node.js runtime. The current docs recommend Node 24, with Node 22.14+ still supported. The installer detects your platform, installs Node if needed on supported paths, installs OpenClaw, and can launch onboarding.
Step 1: Verify your Node.js version. Open a terminal and run:
bashnode --version
Use Node 24 when possible. If you need to stay on Node 22, keep it at 22.14 or newer. If the command returns an older version or "command not found," the installer will attempt to install Node.js automatically on common paths. If you prefer to manage Node.js manually, install it through your platform's recommended method first:
bashcurl -fsSL https://deb.nodesource.com/setup_24.x | sudo -E bash -
sudo apt-get install -y nodejs
Step 2: Run the installer script. This single command downloads and executes the official installer:
bashcurl -fsSL https://openclaw.ai/install.sh | bash
The script performs several actions automatically: it verifies system requirements, installs OpenClaw, and creates the expected OpenClaw state/config area. Use the official install docs or openclaw --version for the live version rather than copying a static version number from a guide.
Step 3: Run the onboarding wizard. After installation completes, the onboarding command walks you through initial configuration:
bashopenclaw onboard --install-daemon
The wizard prompts for the model/provider route, auth method, Gateway mode, and startup behavior. The --install-daemon path installs a managed service or login startup route for your platform, then writes the config shape that the Gateway expects.
Step 4: Verify the installation. Run the built-in diagnostic tool to confirm everything is connected properly:
bashopenclaw gateway status
openclaw doctor
A healthy installation confirms that the Gateway is running, the config is valid, and the selected provider route is reachable. If any check fails, fix Gateway/config issues before debugging channels or model quality.
macOS-specific note: macOS or a third-party firewall may ask whether the OpenClaw/Node process can make network connections. Allow outbound HTTPS only to the provider, gateway, and channel endpoints you intentionally use. If a model or channel fails only on macOS, check firewall prompts before rotating provider keys.
Linux daemon setup: Prefer openclaw onboard --install-daemon for the managed startup path because it writes the config shape expected by your installed version. If you intentionally own a custom systemd unit, build it from the current OpenClaw docs and verify the exact ExecStart, user, config path, logs, and restart behavior on that host before calling it production-ready.
Installing OpenClaw on Windows WSL2 and via Docker
Windows has two practical paths: the current native PowerShell installer for supported setups, and WSL2 for users who want the steadier Linux-like agent workflow. Docker Compose is another option when you prefer containerized deployment or want the same pattern on a VPS.
Windows WSL2 Installation
WSL2 is still the safer Windows recommendation for users who expect Unix-style tools, local development workflows, or Linux service behavior. If you do not already have WSL2 enabled, the setup usually starts with a PowerShell command with administrator privileges followed by a system restart.
Step 1: Install WSL2. Open PowerShell as Administrator and run:
powershellwsl --install
This command enables the WSL2 feature, downloads and installs the default Ubuntu distribution, and configures the virtual machine. Restart your computer when prompted. After rebooting, Ubuntu will launch automatically to complete its initial setup, asking you to create a Linux username and password.
Step 2: Update packages and install Node.js. Inside the WSL2 Ubuntu terminal:
bashsudo apt update && sudo apt upgrade -y
curl -fsSL https://deb.nodesource.com/setup_24.x | sudo -E bash -
sudo apt-get install -y nodejs
Step 3: Install OpenClaw. The same installer script used for native Linux works inside WSL2 without modification:
bashcurl -fsSL https://openclaw.ai/install.sh | bash
openclaw onboard --install-daemon
The onboarding wizard follows the same Gateway-first contract described above. One WSL2-specific consideration is networking: if the Windows browser cannot reach the dashboard opened by openclaw dashboard, verify the actual port printed by the command and WSL2 localhost forwarding before changing OpenClaw config.
Docker Compose Installation
Docker Compose is useful for isolated hosts, repeatable deployment, and teams that already operate containers. Before publishing or using a compose file, confirm the current image name, ports, volume paths, and environment variables from the OpenClaw Docker docs or release notes. Containerization reduces Node-version drift, but it does not remove the need to manage secrets, backups, firewall rules, and upgrades.
Step 1: Install Docker. If Docker is not already present on your system, install it using the official convenience script (for Linux and WSL2) or Docker Desktop (for macOS and Windows):
bash# Linux / WSL2
curl -fsSL https://get.docker.com | sh
sudo usermod -aG docker $USER
# Log out and back in for group changes to take effect
Step 2: Create a project directory and configuration file. Treat the following as a compose shape, not a guaranteed current image contract. Verify the image and mounted paths for your installed version before use:
bashmkdir -p ~/openclaw-docker && cd ~/openclaw-docker

cat > docker-compose.yml <<EOF
version: '3.8'
services:
  openclaw:
    image: openclaw/openclaw:latest # verify the current image name/tag
    container_name: openclaw
    restart: unless-stopped
    ports:
      - "127.0.0.1:18789:18789"
    volumes:
      - ./data:/app/data # verify the current data/config path
      - ./.env:/app/.env # prefer Docker secrets or a secret manager for teams
    environment:
      - NODE_ENV=production
EOF
The port mapping 127.0.0.1:18789:18789 restricts the gateway to localhost on the Docker host. That is a safer default for personal testing. For production or team access, put the gateway behind an authenticated reverse proxy or tunnel rather than exposing it directly.
Step 3: Create your environment file or secret source. Before starting the container, provide the provider and channel credentials your actual route needs. Do not assume every deployment needs the same keys:
bashcat > .env <<EOF
PROVIDER_API_KEY=your-provider-key
CHANNEL_TOKEN=your-channel-token-if-used
EOF
Step 4: Start the container. Launch OpenClaw in detached mode:
bashdocker compose up -d
Verify the container is running and healthy:
bashdocker compose ps
docker compose logs --tail 50
The logs should show whether OpenClaw initialized, loaded config, reached the selected provider, and connected to any enabled channel. If you see connection errors, identify the owner first: provider auth, channel token, gateway config, container networking, or outbound firewall.
Docker networking note: If you run other services behind a reverse proxy like Nginx or Caddy, route traffic to OpenClaw only after confirming the gateway auth model for your version. Do not change the port mapping to 0.0.0.0:18789:18789 unless an authenticated proxy, firewall, and access policy are already in place.
Docker resource limits: On VPS instances with limited RAM, you can constrain the container so OpenClaw does not starve co-located services. Verify limits with your real workload rather than copying a universal size:
yamlservices:
  openclaw:
    # ... other settings
    deploy:
      resources:
        limits:
          memory: 512M
          cpus: '1.0'
This example caps the container, but the right limit depends on enabled plugins, channel volume, logs, memory retrieval, and the model route. If the host is swapping or gateway logs show memory pressure, raise the limit or move OpenClaw to a cleaner host.
Hardware Requirements and Performance Optimization
OpenClaw itself is usually not the heavy part of the stack. The harder question is whether the host can stay reachable, restart cleanly, keep configuration safe, and survive the surrounding workload you run beside it. Avoid treating old hardware tables or VPS price snapshots as current requirements; verify the machine you will actually deploy.
Use this capacity checklist instead:
| Deployment route | Verify before production | Main risk |
|---|---|---|
| Existing laptop or desktop | Sleep settings, network reachability, restart behavior, local secret storage | The machine disappears when the user closes it, reboots it, or changes networks. |
| Home lab or small single-board server | Power protection, storage reliability, disk backups, update path | Home power/network instability can break webhook-style workloads. |
| VPS or managed server | Provider region, restart policy, firewall rules, backup snapshot, monthly invoice owner | Hosting bills, exposed ports, and provider maintenance windows need ownership. |
| Team/server deployment | Secret rotation, log retention, service monitoring, rollback plan | More users means configuration drift and credential ownership matter more than raw CPU. |
For performance, measure the OpenClaw process and the connected model route separately. If local CPU and memory stay low while responses are slow, the bottleneck is probably model latency, provider quota, context size, or network round-trip time. If the host itself is overloaded, reduce co-located services, rotate logs, or move the gateway to a cleaner server before blaming the model provider.
Performance tuning tips: Tune the layer that is actually slow. If the Gateway process is memory constrained, inspect host metrics and Node options supported by your deployment. If the provider route is slow, check model latency, context size, streaming support, and quota state. If disk usage grows, configure log rotation through Docker logging, system logrotate, or the current OpenClaw log controls documented for your version.
Environment Variables and API Key Configuration
OpenClaw behavior can be controlled through a mix of config files, auth profiles, environment variables, and container secrets. Understanding which source wins is essential because stale environment values can override the config you think you changed.
LLM Provider Configuration
OpenClaw can route to multiple LLM providers when they are configured, authenticated, and allowed by the selected agent. At minimum, you need one working model route, whether that is a direct provider, local runtime, or gateway.
bash# Anthropic Claude
ANTHROPIC_API_KEY=your-current-anthropic-key

# OpenAI-compatible provider
OPENAI_API_KEY=your-current-openai-compatible-key

# Google Gemini route
GOOGLE_AI_API_KEY=your-google-key-here

# Local runtime endpoint if used
OLLAMA_BASE_URL=http://localhost:11434
For a deep walkthrough of configuring each provider, including model selection and parameter tuning, see the comprehensive guide to configuring LLM providers in OpenClaw. If you want to connect custom or self-hosted models, the configuring custom models in OpenClaw guide covers endpoint configuration and model aliasing.
API Gateway Alternative: If you prefer accessing multiple LLM providers through a single unified endpoint rather than managing separate API keys, configure that route as a custom provider or OpenAI/Anthropic-compatible proxy and verify the current provider docs before publishing price, model, or uptime claims. A gateway can simplify auth, but it also changes which native request features survive the proxy hop.
Messaging Platform Tokens
Each messaging platform or channel requires its own authentication token and permission model. Enable only the channels you actually use, then test each one from that surface:
bash# Telegram (most common for personal use)
TELEGRAM_BOT_TOKEN=123456:ABC-your-bot-token

# WhatsApp (requires Meta Business API)
WHATSAPP_TOKEN=your-whatsapp-token
WHATSAPP_PHONE_NUMBER_ID=your-phone-id

# Slack
SLACK_BOT_TOKEN=xoxb-your-slack-token
SLACK_SIGNING_SECRET=your-signing-secret

# Discord
DISCORD_BOT_TOKEN=your-discord-token
For Telegram, Slack, Discord, WhatsApp, or any other channel, follow the current platform-specific OpenClaw guide and the platform developer console. Channel errors should be debugged separately from model-provider auth errors.
Security Best Practices for Credentials
Your .env file contains sensitive credentials that, if exposed, grant access to your LLM accounts and messaging platforms. Treat this file with the same care as SSH private keys or database passwords. On Linux servers, restrict file permissions immediately after creation:
bashchmod 600 ~/.openclaw/.env
Never commit .env files to version control. If you use a configuration management tool like Ansible for multi-server deployments, store secrets in an encrypted vault rather than plaintext playbooks. For Docker deployments, consider using Docker secrets or a secrets manager rather than bind-mounting a plaintext .env file, especially in team environments where multiple people have access to the Docker host.
Rate Limiting and Cost Control
OpenClaw can send every incoming message through a paid model route, so busy channels can create real costs quickly. Configure spend controls and rate limits where your current OpenClaw version and provider route support them:
bash# Maximum messages per user per hour, if supported by your version
RATE_LIMIT_PER_USER=30

# Daily spend cap, if supported by your version/provider integration
DAILY_COST_LIMIT=5.00

# Model selection belongs in the current model config/auth route
These controls provide a safety net only if your installed version actually enforces them. Monitor actual provider or gateway spend during the first week, then adjust limits from observed traffic instead of estimates.
Advanced configuration tips: OpenClaw supports model routing and fallback patterns, which lets you assign different LLM routes to different agents, conversation types, or recovery paths. Use this for reliability first, then cost control after you have real usage data. Do not promise a fixed savings percentage; actual cost depends on context size, tool use, model pricing, cache behavior, and how often fallbacks trigger.
First Run, Testing, and Troubleshooting
After installation and configuration, the first run is where you confirm that every component — Node.js runtime, LLM provider, messaging bridge, and web dashboard — functions correctly as an integrated system. A methodical verification process saves hours of debugging later.
Step 1: Run the diagnostic suite. The openclaw doctor command performs a comprehensive health check:
bashopenclaw doctor
A fully healthy system should confirm the same kinds of signals, but do not rely on exact sample versions:
[OK] Node.js is supported
[OK] OpenClaw CLI is available
[OK] Gateway runtime is running
[OK] Configuration validates
[OK] Selected model provider is reachable
[OK] Control UI can connect to 127.0.0.1:18789
If any check fails, the output identifies the specific issue and suggests a resolution. Address failures in order from top to bottom, since later checks often depend on earlier ones (for example, the Telegram connection check will fail if the configuration file cannot be read).
Step 2: Send a test message. Start in the Control UI opened by openclaw dashboard, then test your configured channel. If the dashboard works but the channel does not, debug pairing/channel permissions. If neither works, debug Gateway health and model auth first.
Step 2.5: Test multi-turn conversation. Send two or three follow-up messages to verify that OpenClaw maintains conversation context. Ask it to remember something from your first message, then reference it in a later message. This confirms that the conversation history system is working correctly and that the LLM is receiving the full context window rather than treating each message as an isolated query.
Step 3: Open the web dashboard. The dashboard provides a visual overview of system status, recent conversations, and configuration:
bashopenclaw dashboard
This opens your default browser to the local dashboard interface. From the dashboard, you can monitor active conversations, adjust model parameters, and review usage statistics.
Common errors and their solutions:
Error: "ANTHROPIC_API_KEY is invalid or expired" — Verify the key in the Anthropic Console, confirm the selected model is available to that account, and check whether Docker or shell environment variables override the value OpenClaw is loading. Do not rely on a key prefix as proof of validity. For detailed troubleshooting of Anthropic key issues, see troubleshooting Anthropic API key configuration errors.
Error: "EACCES permission denied" during installation — The installer tried to write to a directory that requires elevated permissions. On Linux, either run the installer with sudo or change ownership of the target directory. On macOS, the Homebrew prefix (/usr/local/) usually has correct permissions, but if you installed Node.js through a different method, ~/.local/bin/ may need creation.
Error: "Port 18789 already in use" — Another process occupies the gateway port. Identify and stop it with:
bashlsof -i :18789
# Stop only the process that you have confirmed owns the stale OpenClaw gateway.
kill <PID>
Then restart OpenClaw. If the conflict is persistent because another service legitimately uses that port, configure OpenClaw to use the alternate port mechanism documented for your installed version.
Error: "429 Too Many Requests" — Your LLM provider is rate-limiting your API calls. This typically happens during initial testing when you send many messages in quick succession. Wait a few minutes and retry. For persistent rate limit issues, see how to resolve rate limit errors in OpenClaw.
Error: "WebSocket connection failed" (Telegram/Discord) — This usually indicates a network-level block on outbound WebSocket connections. Corporate firewalls, restrictive VPN configurations, and some ISPs in certain regions block WebSocket traffic. Test from a different network or configure OpenClaw to use long-polling mode as a fallback.
Diagnostic commands reference: When standard troubleshooting does not resolve an issue, these commands provide deeper visibility:
bash# Real-time log output
openclaw logs --follow

# System status summary
openclaw status

# Check connectivity to all configured providers
openclaw doctor
openclaw gateway status --deep

# Repair config only with the current documented command/path
openclaw doctor
Upgrading, Backup, and Long-Term Maintenance
Installation is a one-time event; maintenance is ongoing. OpenClaw changes quickly, and keeping your installation current ensures you receive provider fixes, Gateway guardrails, security patches, and new onboarding behavior. Equally important is establishing a backup routine before any update so that a failed upgrade never results in lost configuration or conversation history.
Checking for updates: Use the update mechanism supported by your installation method, then read the release notes before changing a production deployment:
bashopenclaw update --check
If your version does not support openclaw update --check, use the package manager, container registry, or GitHub releases feed that matches your install path.
Backup procedure: Before applying any update, back up your configuration and data. The critical files live in two locations:
bash# Native installation backup
cp -r ~/.openclaw ~/openclaw-backup-$(date +%Y%m%d)

# Docker installation backup
cp -r ~/openclaw-docker/data ~/openclaw-data-backup-$(date +%Y%m%d)
cp ~/openclaw-docker/.env ~/openclaw-env-backup-$(date +%Y%m%d)
The backup captures your .env file (API keys and tokens), conversation history, custom configurations, and any plugins or extensions you have installed. Store at least one backup generation off-machine — a USB drive, cloud storage, or a different server — so that a hardware failure does not take both your installation and its backup.
Applying updates: The update command varies by installation method:
bash# Installer script method
openclaw update

# npm global method
npm update -g openclaw

# Docker Compose method
cd ~/openclaw-docker
docker compose pull
docker compose up -d
For Docker deployments, the pull command downloads the selected image, and up -d recreates the container while preserving mounted data if the volume path is correct. Docker reduces Node.js version drift, but it does not eliminate migration, config, or image-tag risk.
Rollback procedure: If an update introduces problems, restoring your backup is straightforward:
bash# Native installation rollback shape
openclaw stop
mv ~/.openclaw ~/.openclaw-broken-$(date +%Y%m%d-%H%M%S)
cp -r ~/openclaw-backup-YYYYMMDD ~/.openclaw
openclaw start

# Docker rollback (to previous image)
docker compose down
docker compose pull openclaw/openclaw:<last-known-good-tag>
docker compose up -d
For Docker, pin a tested release tag instead of floating on latest when uptime matters. Roll back only to an image and data/config combination that you have already tested together.
Ongoing monitoring: A healthy maintenance routine includes periodic checks beyond just updating. The following commands form a lightweight monitoring workflow that catches issues before they become outages:
bash# Quick health check (run daily or via cron)
openclaw status

# Check gateway connectivity and API key validity
openclaw doctor

# Review recent logs for errors or warnings
openclaw gateway logs --tail 100

# Open the dashboard for a visual status overview
openclaw dashboard
For headless servers without a desktop browser, forward the actual dashboard/gateway port printed by openclaw dashboard through SSH and access it from your local machine.
Log management: OpenClaw generates logs continuously during operation. Without rotation, these logs can consume significant disk space over months. On Linux, configure logrotate to manage OpenClaw's log files automatically:
bashsudo tee /etc/logrotate.d/openclaw > /dev/null <<EOF
/var/log/openclaw/*.log {
    daily
    rotate 7
    compress
    missingok
    notifempty
}
EOF
For Docker deployments, Docker's built-in log driver handles rotation. Add the following to your docker-compose.yml under the OpenClaw service to limit log size:
yamllogging:
  driver: json-file
  options:
    max-size: "10m"
    max-file: "3"
Security maintenance: Periodically rotate your API keys and messaging tokens, especially if you suspect any may have been exposed. Update the keys in your .env file and restart OpenClaw. Additionally, keep your host operating system and Docker engine updated to receive security patches that protect the platform underlying OpenClaw itself.
Summary and Next Steps
You now have a complete roadmap for deploying OpenClaw on any platform, from a five-minute local install to a production-grade Docker deployment on a VPS. The key decisions come down to three factors: your hardware situation (own machine vs. rented VPS), your comfort level with containerization (native install vs. Docker), and your availability requirements (occasional use vs. always-on).
For most users, the optimal path is to start locally with the installer script, validate your API keys and messaging platform connections, and then migrate to a Docker Compose deployment on an affordable VPS like Hetzner or Fly.io once you have confirmed the assistant works the way you want. This two-phase approach minimizes wasted time and money while giving you a production-quality setup.
What to do next:
After your installation is running, the natural next steps involve deepening your LLM configuration and optimizing costs. The comprehensive guide to configuring LLM providers in OpenClaw walks you through switching between Claude, GPT, Gemini, and local models based on task type and budget constraints. For users operating on a tight API budget, the detailed strategies for managing OpenClaw API costs guide covers rate limiting, model routing, and cost monitoring techniques that keep spending predictable.
Recommended exploration path: Once the basics are working, consider these enhancements in order of impact. First, connect a second messaging platform if that is part of your real workflow. Second, experiment with model routing by assigning lower-cost routes to casual conversations and stronger verified routes to complex tasks; measure cost changes in your provider dashboard instead of assuming a fixed savings percentage. Third, explore the plugin ecosystem through the OpenClaw dashboard; community-built plugins can add capabilities, but each plugin should be tested against your version before production use.
Keeping up with the project: Subscribe to the GitHub releases feed (github.com/openclaw/openclaw/releases) to receive notifications when new versions drop. Major version bumps can introduce breaking changes, so reading the release notes before updating is a habit worth building. Use the current project support channels listed by OpenClaw for help instead of relying on an old article's community links.
After the first message works, keep the setup honest: verify the Gateway after updates, keep secrets out of git, back up config before migrations, and test every provider or channel route from the surface that will actually use it.